|
Quick Exam Tool |
  
|
|
Quick Exam Tool |
|
The Ocular Exam Findings tool allows for a complete assessment and documentation of eye health. It is divided into three major parts: General Findings, Anterior Segment and Posterior Segment.
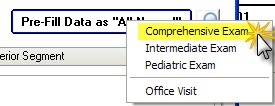
One feature that makes the exam tool very efficient is that it is possible to pre-fill all the tests with normal values using an Ocular Exam Template. Click the "Pre-Fill Data as All Normal" button at the top and select the template you wish to use. You can use the Customize button to create your own templates.
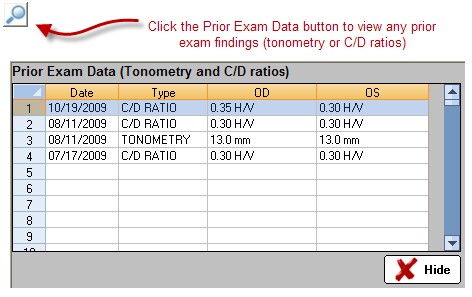
Using the small search icon button next to the All Normal button will allow you to view prior exam data (in particular tonometry and C/D ratio results).
General Findings
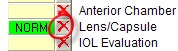
To indicate Normal Findings, click the beige color button next to the item one time. It will turn green to indicate normal.
![]()
To create an Abnormal finding click it one additional time. The Detailed Exam Findings screen will appear.
Click each item you wish to include and uncheck the findings that may not apply (e.g. the default normal findings that may be pre-checked. You can use the Customize button to set the statements to your liking.
To clear an item, click the red X next to the button.
Anterior Segment
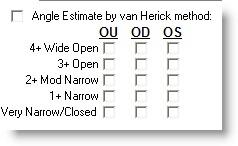
Much like the other sections, simply click the beige buttons to indicate normal (green) or click twice to create a Abnormal finding. You can indicate angle grades by using the check boxes in the Angle Assessment section:
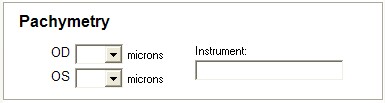
Pachymetry Readings can also be easily set:
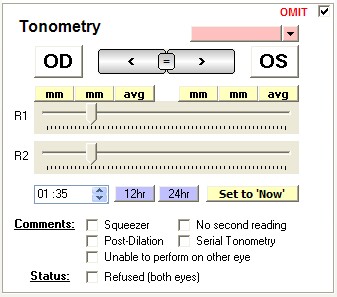
The Tonometry tool allows quick entry of applanation tonometry findings. Start by dragging the R1 (top) slider right or left to the desired reading. If a second reading on that same eye was taken, use the R2 slider. Then click the equal sign to copy OD to OS or click the right arrow to jump to OS side. Enter the OS readings the same way. The time automatically defaults to Now, but you can set it to any time. Then click the red dropdown to select the method (you will be prompted if you forget). Click the arrow to see all the choices. If you did not do tonometry, make sure the Omit box is checked.
Posterior Segment
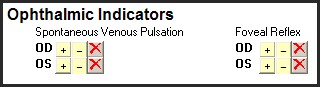
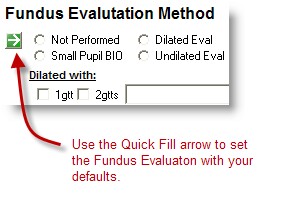
You can set most of the findings using the familiar beige buttons. Extra tools are present for entering Fundus Evaluation, Ophthalmic Indicators and Optic Nerve Head assessment.
Use the Green Arrow to pre-fill the Fundus Evaluation section.
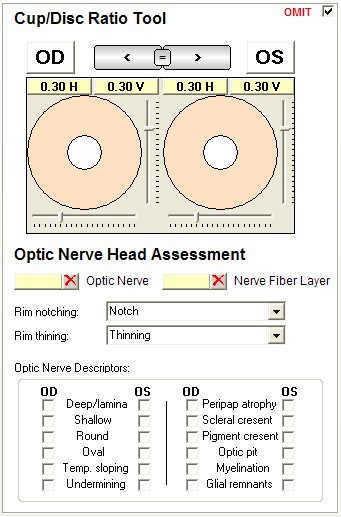
The C/D Tool and ONH Assessment allows you to quickly define the optic nerve head ratios (use the slider buttons to adjust or simply drag the circles bigger or smaller). The left ONH prefills with the data from the right.