|
PickList Customization Tool |
  
|
|
PickList Customization Tool |
|
You can manually create your own statements using the PickList Customization Tool. The steps for doing this for the Exam Findings tool is described below. The steps are nearly identical for the Ocular Symptoms tool (just use the Customize button on that tool).
Step 1
Open any patient chart (or create a new one for a patient... it can be deleted safely when you are done with the customization work).
Step 2
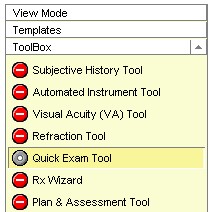
Open the Quick Exam tool (use the left-side menu bar and click on “Quick Exam Tool”).
Step 3
On the Quick Exam Tool screen, find the button that you wish to customize. This can be a pre-existing button (such as “Cornea”) or a Custom button. For demonstration purposes, let's use the Custom#1 button on the “Anterior Segment” tab. The first time you click the button, it turns green (“normal”), however there is no associated text. You can verify this by placing your mouse over the button. Normally, a brief pop-up will appear showing the contents of the text statement.
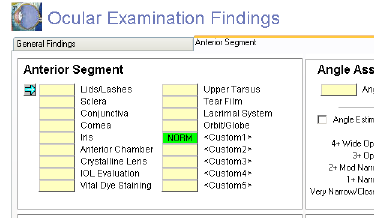
To customize the button, click it again and a new window will appear. This is the Q-Tool “Pick List.” Once your customization is complete, this is where you will be able to quickly choose appropriate exam text to place in your chart notes.
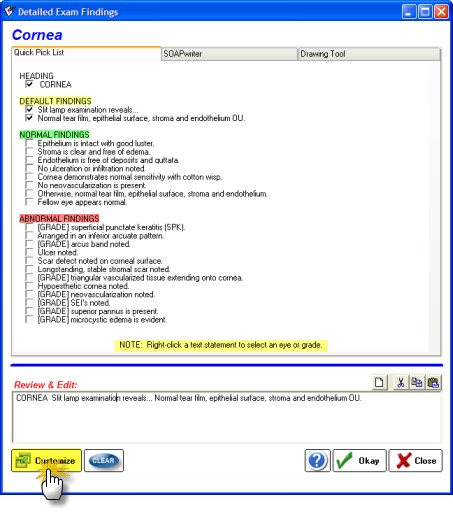
For now however, it looks blank as shown in the sample image. Note that the Category heading says “<Custom1>” and that there are four colored titles in the main area.
Step 4
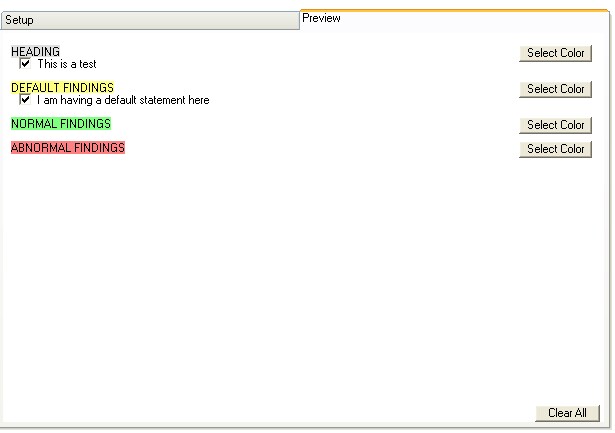
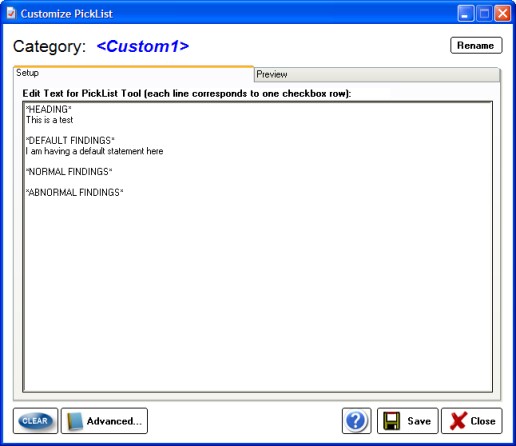
Click on the “Custom” button on the right side and the customization tool (“Customize Pick List”) will open. At the top, make sure the tab marked Setup is selected. You should see a screen with the following text, each representing a different section of your pick list:
*HEADING*
*DEFAULT FINDINGS*
*NORMAL FINDINGS*
*ABNORMAL FINDINGS*
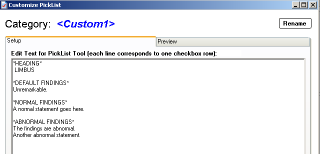
The HEADING label is what the text topic relates to. For instance, if you wish to create a new custom button relating to the limbus, you would add a heading under the section marked *HEADING* and this would be pasted into the SOAP note. The exact way you enter the heading is exactly how it will be inserted into the SOAP note, so include punctuation and spaces as needed. Each of the subsections would be entered in the same way. For example:
*HEADING*
LIMBUS
*DEFAULT FINDINGS*
Unremarkable.
*NORMAL FINDINGS*
A normal statement goes here.
*ABNORMAL FINDINGS*
The findings are abnormal.
Another abnormal statement.
![]() NOTE: The highlighted areas after the text indicate spaces. You should include one or two spaces after every statement so that multiple statements form intact sentences and not run-ons.
NOTE: The highlighted areas after the text indicate spaces. You should include one or two spaces after every statement so that multiple statements form intact sentences and not run-ons.
Once you have entered all the statements that you think you need, it's time to preview your work.
Step 5
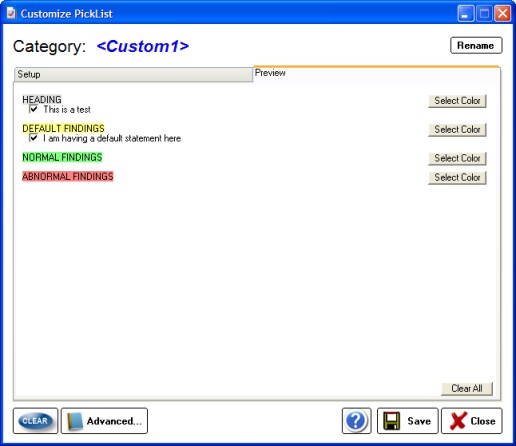
Click on the Preview tab at the top and you will see a rough approximation of what the final display will look like. To finish the customization, you need to check the boxes of the default statements and headings (anything checked will be inserted when a button is set to “NORM”). You may also want to set the color codes for the headings (useful when a large amount of text choices are present).
The standard color system is as follows:
HEADINGS... white or light grey
DEFAULT FINDINGS... yellow
DEFAULT NORMAL... light green
DEFAULT ABNORMAL... light red
You may, however, use any color scheme you desire but it is recommended that you keep it consistent.
Step 6
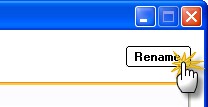
You can now change the name of the <Custom1> button to one of your own liking. In this example, we want to change it to “Limbus”. Simply click on the Rename button at the very top (or double-click the current name) and a edit box displays. Make your changes and save the work (“Accept”).
Step 7
You are now finished creating your custom button. Click “Save” and you will be returned to the orginal Exam PickList. You can select your choices directly. Occasionally, you may need to reload the exam form for the label update the new name on the Exam Tool.
Advanced Options
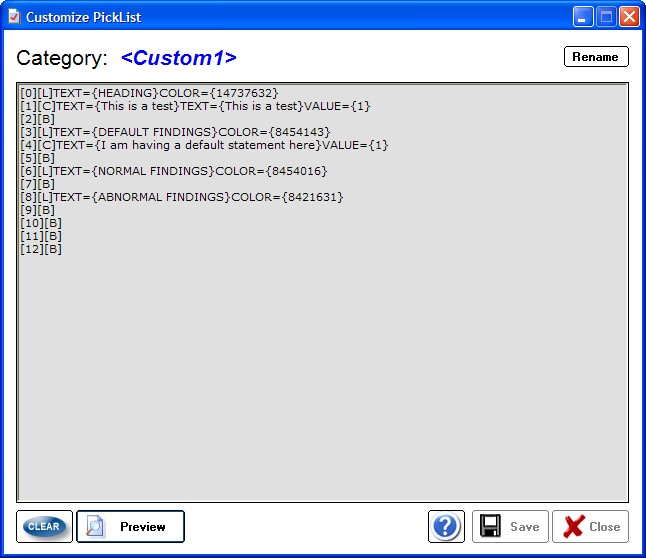
Click the Advanced button to see the raw script that will generate the PickList. You can manually enter or edit data in this way, although care must be taken.
The Fields are as follows:
[#] - the line number, from zero to a maximum of thirty (any more will not display on the PickList page)
[B] - blank line (must be included to insert a blank line)
[L] - Heading text
[C] - Statement text
TEXT=
COLOR=
VALUE=
Each of the text, color and value fields should be followed by the data to be entered enclosed in curly brackets. So the text would look like this: TEXT={This is the sample text inside the brackets. Note the extra space after the period here. }
Color codes can be best entered using the Color buttons on the main screen, then copying the code number.
How it looks in Preview Mode: