|
Customize Appointment Types |
  
|
|
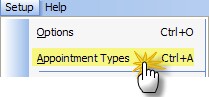
Customize Appointment Types |
|
You can customize the options for appointments using the Appointment Customization tool. This effects the way your appointments display (colors, category names).
Modifying/Adding Items
There are five steps to adding/changing the appointment options:
(1) select the category from the dropdown
(2) click the item in the list (to edit) or click New button to add
(3) enter a color code number (if you want a color other than white)
(4) enter the Item Value (e.g. what you want to add, like "CE" for comprehensive exam)
(5) click Save to save the changes
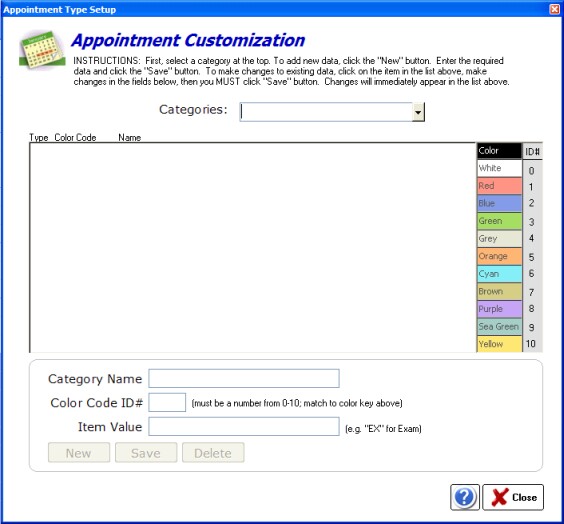
Categories
There are four default categories that can be customized by clicking the dropdown box. Once you select a category, you can edit or delete a subitem by clicking on it in the item list. Or you can add a new item by clicking the New button at the bottom.
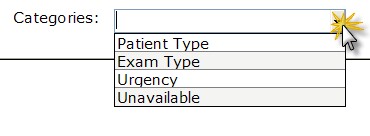
The four patient types are listed below:
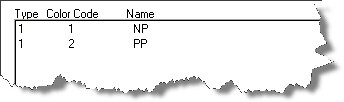
Patient Type
There are two default types that come built-in: NP (new patient) and PP (previous patient).
Exam Types
The built-in exam types are:
CLE Contact Lens Exam
FIT Contact Lens Fitting
FU Follow Up visit
I&R Insertion/Removal Training
OV Office Visit
PO Post-Op visit
RGP Rigid Gas Permeable lens visit
S FU Spectacle Follow-up or Recheck
VE Vision Exam
VF Visual Field Testing
Urgency
The standard urgency types are:
Emergency
Urgent
Normal
Unavailable
For use when a time period is blocked off because of unavailability (e.g. closed for lunch, doctor half-day, etc).
Doctor Meeting
Lunch
Out of Office
Reserved for Walk-ins
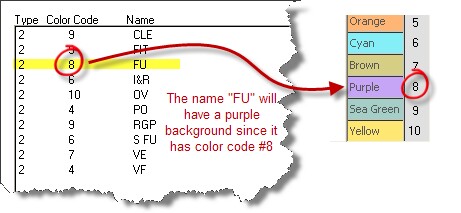
Using Color Codes
Simply enter the number of the color code in the space at the bottom.
![]()